
1.Introduction
This is the manual for the integration between Magento and Eenvoudigfactureren.
The integration is working for these versions of Magento: FAQ - Magento versions. The integration is a basic integration. Magento has many options in the standard version that the integration does not support. In particular, these are:
- Reading shipping addresses. We do have an option for this, but it needs to be programmed on the Magento webshop side.
- Reading payment costs. We do have an option for this, but it needs to be programmed on the Magento webshop side.
- Adding discounts excl. VAT. The integration does not support this.
- Adding credit amounts - adjustments - in credit invoices. The integration cannot process this because the VAT information is missing.
- In some situations, the VAT of free items cannot be determined correctly.
- In some situations, the VAT percentage does not come through correctly from the Magento webshop. This often happens with smaller amounts and/or large quantities. Magento webshops pass on amounts in 2 decimals, not 4. This causes rounding differences. These invoices will have to be entered manually in Eenvoudigfactureren.
- We will supplement this list if we notice that more items are missing.
This integration does not replace the work of an accountant. It saves time because you no longer have to retype documents. The accountant is still needed for advice, expertise, and control.
Tip: Other customers using this integration found the tips in the FAQ for Magento and in the FAQ for Eenvoudigfactureren.
Read more Introduction .... Read less Introduction ....Installing the integration starts with signing up for a trial period, via our integrations page. After registration, you will receive an email containing an installation URL and login details. With this installation URL, you start the installation of the integration.
The installation is complete when both connection dots are green, and the settings in the Configuration tab have been entered and saved.
There is a trial period of 30 days.
If you want to install another integration, you can do so in the same way. Make sure you are logged out of the integration dashboard and preferably start the new installation in an incognito browser.
At the end of the trial or subscription period, the integration will not be automatically renewed. You will receive an offer for a one-year subscription or renewal by email at the end of this period. You can confirm the renewal by using the payment link in that email. Do you want to terminate the integration in the meantime? Please send us an email with the request and the license key. We can only stop integrations for you as of the current date, not on a future date.
Are you switching to another web shop/accounting system and do you want to re-establish a connection? In this faq we explain how to do this.
We advise you to deactivate the OAuth keys of the integration in your Magento webshop when uninstalling the integration.
2.How the integration works
Invoices are retrieved from the Magento webshop once per hour. This integration processes Magento invoices, not Magento orders. The integration works for both Magento 1.9 and Magento 2.x webshops, starting from Magento 2.1. Therefore, we do not support Magento 2.0.
Read more How the integration works .... Read less How the integration works ....
At the start of processing an invoice, we perform a number of checks on the Magento invoice:
- It is checked whether the total of the Magento invoice is equal to the sum of the amounts in the invoice lines.
- If the invoice is an ICP invoice, the VAT number is checked.
- It is checked whether a corresponding VAT code exists in Eenvoudigfactureren for the VAT in each line.
- It is checked whether the invoice has not already been processed.
Upon a successful check, the Eenvoudigfactureren invoice is created and processed to Eenvoudigfactureren. The debtor details are placed in the Eenvoudigfactureren invoice. Eenvoudigfactureren itself checks if the debtor is already present.
After the invoice has been forwarded and a success message from Eenvoudigfactureren has been received, the invoice is marked as completed. The Magento invoice appears in the Report tab on the dashboard.
If Eenvoudigfactureren returns an error while processing the invoice, the invoice appears in the Errors tab on the dashboard. Via the yellow button More info more information about the problem can be found. Via the red button Report problem can the invoice with all necessary information easily be submitted to us after you have tried to resolve the problem yourself. If the problem is solved, in some cases the invoices can be processed again with the blue Process button.
Data
Information about the data that is processed can be found in the section Day-to-day: To Eenvoudigfactureren later in the manual.
3.Required: Magento keys - only Magento 1.x
This step is only necessary for Magento 1.x. If you have a Magento 2.x webshop, you can skip this chapter!
3.1 Install extension
Installing and configuring the extension for Magento 1.x consists of the following steps:
First, check if your Magento webshop environment allows the use of the REST API. This check consists of the following steps. We use www.jouwwebwinkel.nl as the URL of your webshop.
(i) Is the REST API accessible? You can test this with the url http://www.jouwwebwinkel.nl/api/rest/products. Do you see a 403 appear on your screen? Fine. But …
(ii) … do you see a 404-screen?
Then the URL is redirected to an error page. This could be a problem with the .htaccess file. The line RewriteRule ^api/rest api.php?type=rest [QSA,L] must be present in this file. If not, you need to add it.
The problem could also be caused by a setting in the Apache web server. See this link for more information: http://magento.stackexchange.com/questions/29936/rest-api-returns-404.
(iii) Does the username you used to create the OAUTH keys have admin rights? That is actually necessary, otherwise the data cannot be retrieved from the webshop.
(iv) Do you use php-fpm fastcgi in the hosting environment? In that case, the authorization keys may not be transmitted correctly. This link contains more information: http://www.magentogeek.com/magento-rest-api-solution-for-400-bad-request/. This applies, among other things, to webshops hosted at byte.nl - shared hosting. They have a good explanation to solve this.
(v) In all cases: Contact us if you can't figure it out. We sometimes see details in our log files that might help you resolve the problems.
1. Turn off caching in your webshop. You can do this via System > Cache Management. After installing the extension, you can turn caching back on.
2. Install extension. Unzip the file and install the files under your Magento root. You can see from the structure of the zip file where to place which files. No files will be overwritten.
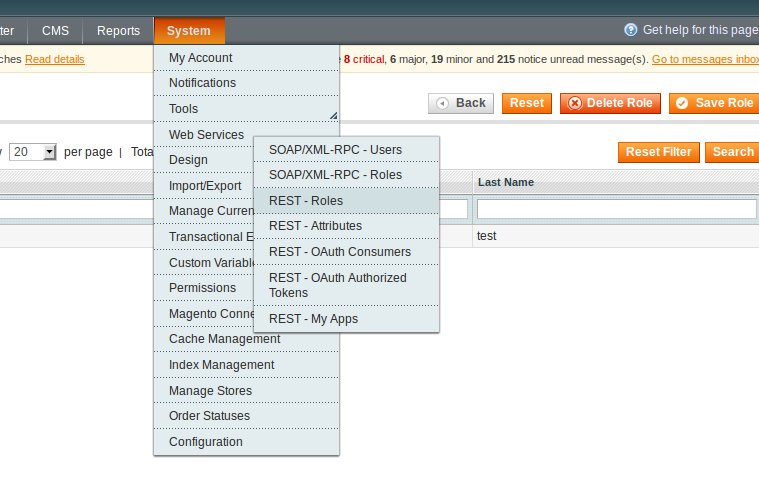
3. Define the REST Role. You first define a so-called Role that can read the invoice details, including tax rates and payment methods, from your webshop. To do this, go to System > Web Services > REST Roles. To use the extension, you need to create a Role of type Administrator. You create this by clicking Add Admin Role. If you already have one, you can reuse that Role.
On the left side of the screen is a screen titled Role Information. Click on the sub-menu link Role API Resources. You will see the option REST API Calls to read invoices appear. Check all the boxes under this option and save the details.

You have now configured the integration to have the right to read the invoices, tax rates, and payment methods entities from Magento, but you have not yet specified which data it is allowed to retrieve per entity.
4. Assign the fields that can be read. Go to System > Web Services > REST Attributes. Open the User Type Admin. Here, you will see the option REST API Calls to read invoices appear again. Check all options again and save the details.

5. Link the administrator to the REST role. Finally, you need to assign the administrator to the REST role. Go to System > Permissions > Users. Click on the administrator of the webshop. Go to REST Role, the bottom option in the menu on the left. Assign the administrator of the webshop to the Administrator REST Role.

The steps for creating a Magento consumer key and consumer secret are as follows:
1. Log in as admin to your Magento 1.x webshop.
2. Go to System > Web Services > REST OAuth Consumers.
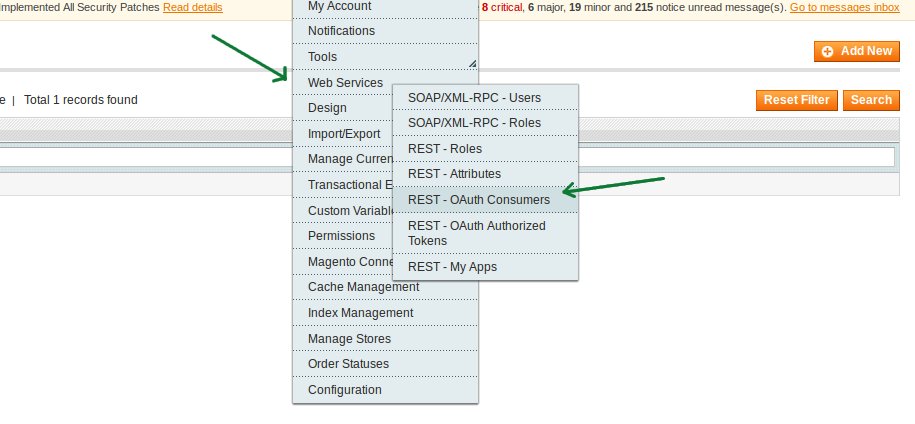
3. Click Add new to create the Magento keys. The key and secret are already filled in. Enter the name for the connection and the callback URL yourself. The value of the callback URL must be: https://interface.cloudinvoice.company/api/v1/servlet/magento/callback.php

4. Enter your administrator password. Click Save. You will enter the key and secret from this screen in a later chapter in the Consumerkey and Consumersecret fields of the connection settings screen.
4.Required: Magento after version 2.1
Magento webshops up to and including version 2.4.3 should follow the steps below to establish a connection with the webshop. For Magento webshops from version 2.4.4 onwards, we recommend creating an integration as explained below, but without a callback. If you contact us afterwards, we will ensure that you can enter the client ID / client secret / access token and token secret to establish the connection with the Magento webshop.
Please note: This is a standard integration without customization options. This means that the integration does not support all extensions in the webshop. It can also be difficult to connect the webshop due to a specific hosting configuration, for example, because of a modified .htaccess file, complex redirects, or a firewall. If you encounter these problems, it is often necessary to engage a Magento expert.
Installing and configuring the extension for Magento 2.x consists of the following steps:
1. Configuration. There are two Magento tabs you need to fill in. For the first one, we come up with a recognizable name and enter the Callback URL (https://interface.cloudinvoice.company/api/v1/servlet/magento2/callback.php?cikey=YOURLICENSEKEY), the Identity link URL (https://interface.cloudinvoice.company/api/v1/view/cloudinvoice/authenticate.php), and your password. YOURLICENSEKEY must be replaced with the license key from the email. It is always smart to save in between (top right). After that, we move on to the second tab, API.
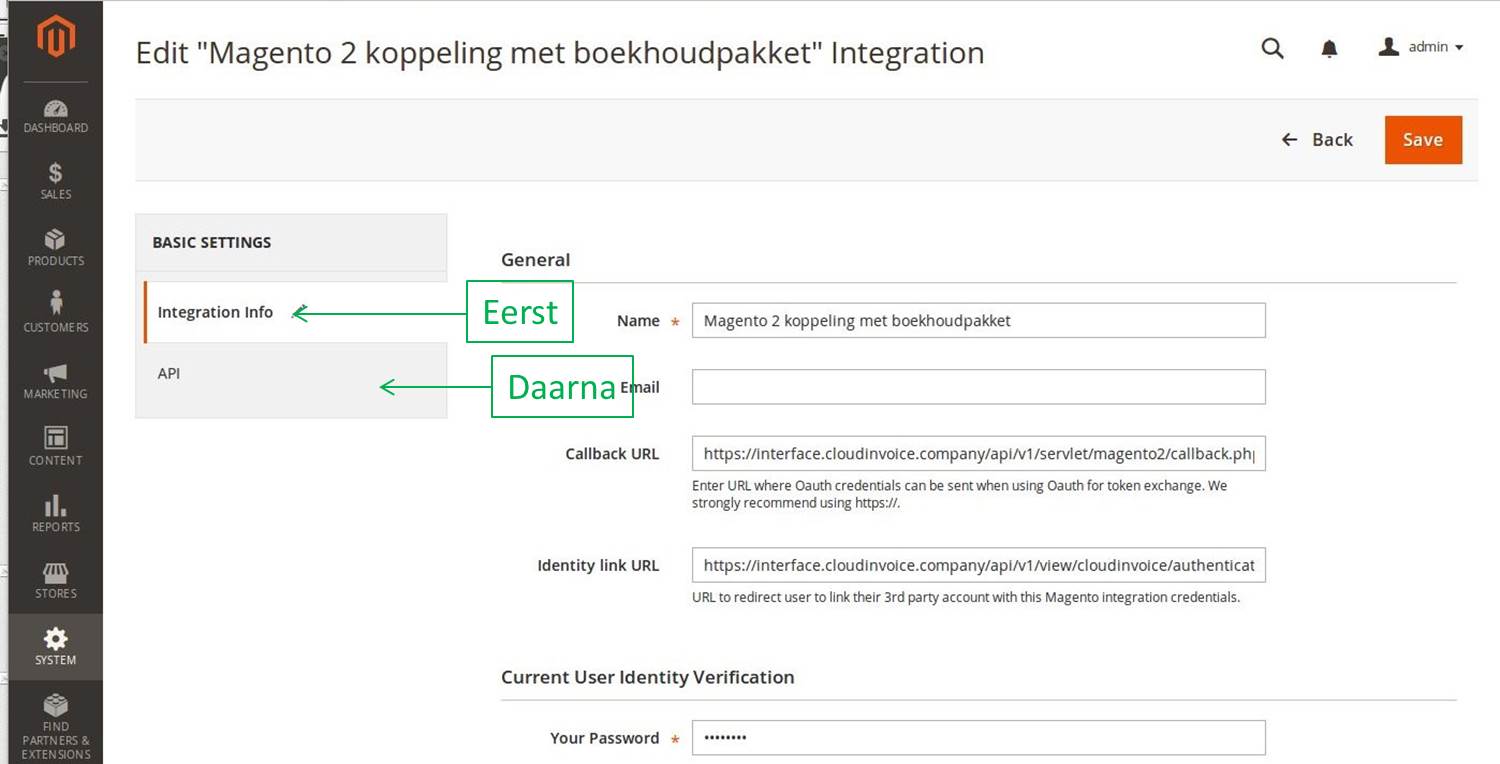
You are now going to assign the permissions: which data from the webshop is the integration allowed to use? The image explicitly indicates which resources you need to check. Then click SAVE in the top right.
 2. Activating the extension. You are now going to activate the extension. First, click on ACTIVATE.
 You must grant permission to do so using the ALLOW button in the top right of the next screen.
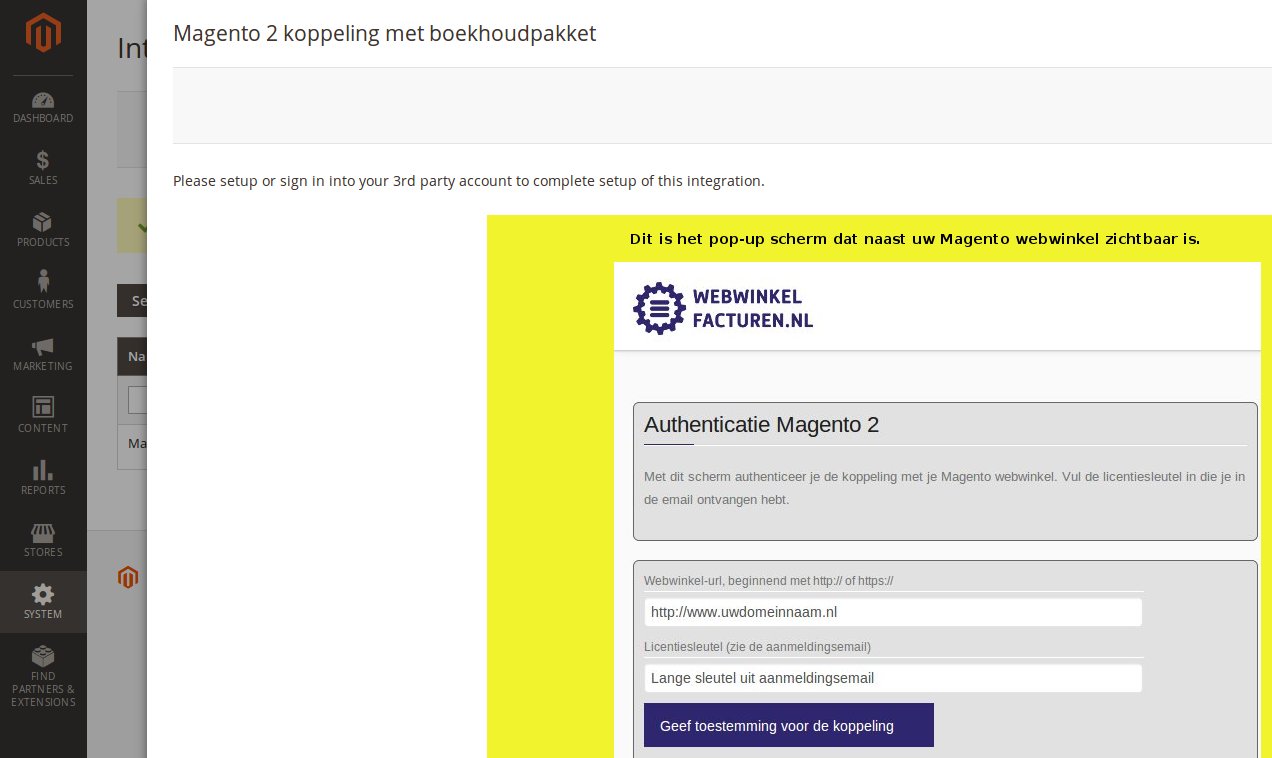
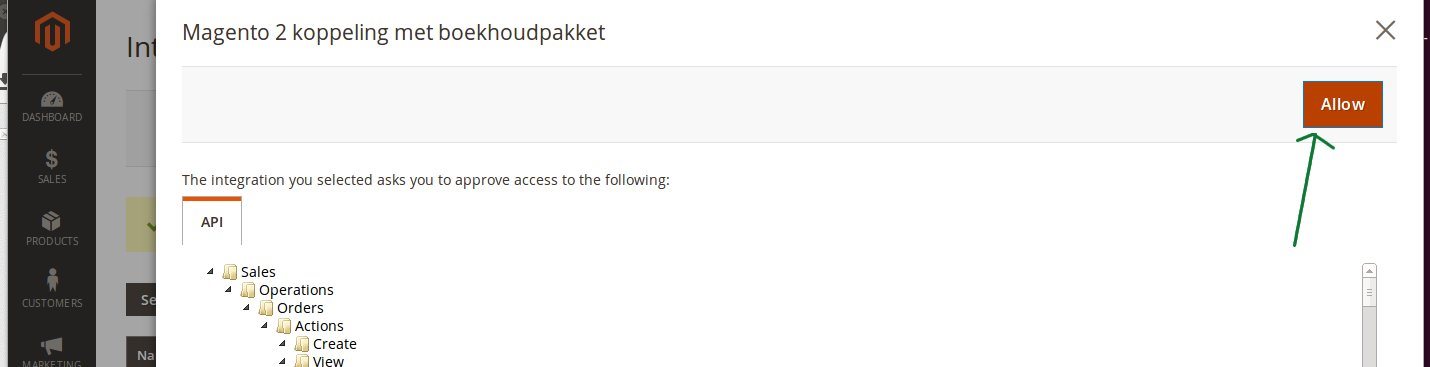 And now you finally understand why Magento 2 is called 'Magento 2': two windows open! On the first window (so outside your Magento store):

In this separate window, enter your webshop domain name and the connection key you received by email upon registration. If you then click the Consent to connect button, you will see the activation take place in the other screen (of your Magento store).
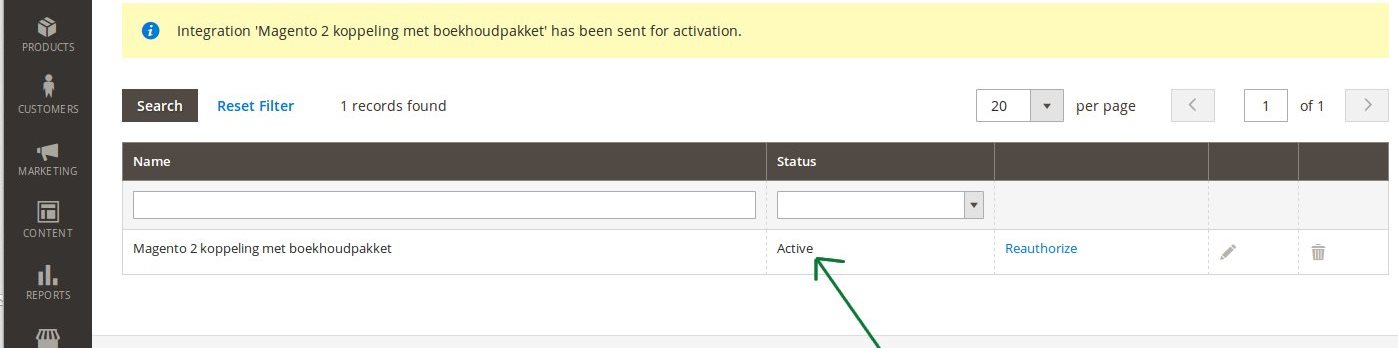
 The extension is now fully activated. To be sure, you can check the status of your integration on the Integration screen within your Magento webshop. The status should now be ACTIVE.
 You have now completed the preparations in your Magento 2.x store.
5.Required: EenvoudigFactureren
- Log in to EenvoudigFactureren
- Go to Profile (top right) > Access Management
- Click on add API key
- In terms of management, you can select either All or a limited set. With a limited set, the integration requires access to Invoices, Customers, Items, and Layouts.
- Make a copy of the generated API key. You will need this key in the next Installation section.

6.Installation
Installing the integration starts with signing up for a trial period, via our integrations page. After registering, you'll receive an email with an installation URL and login details. Use this installation URL to start the integration installation.
Activating the integration consists of three steps:
1. Establishing the connection with the Magento webshop. For Magento 2.x webshops, you have already done this in the previous step. For Magento 1.9 webshops, you need to fill in additional details here.
2. Establishing the connection with Eenvoudigfactureren. This authorizes the integration to write transactions to your Eenvoudigfactureren administration and read information.
3. Configuring additional data, such as the VAT settings. Please note: The integration uses the amounts from the webshop to calculate the VAT percentages. Ensure that rounding differences do not cause problems with the VAT percentages.
Authentication Magento webshop:
This step only needs to be performed for Magento 1.9 webshops. For Magento 2.x webshops, the authentication has already been done in the previous step. Authenticating the Magento 1.9 webshop is done as follows:
- First you fill in the admin URL of the webshop with the consumerkey and consumersecret from the previous step.
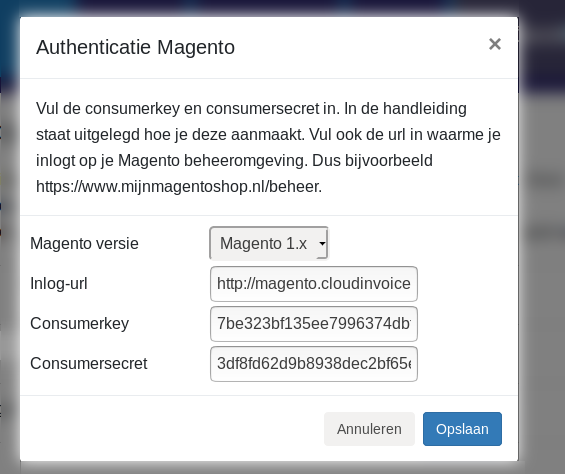
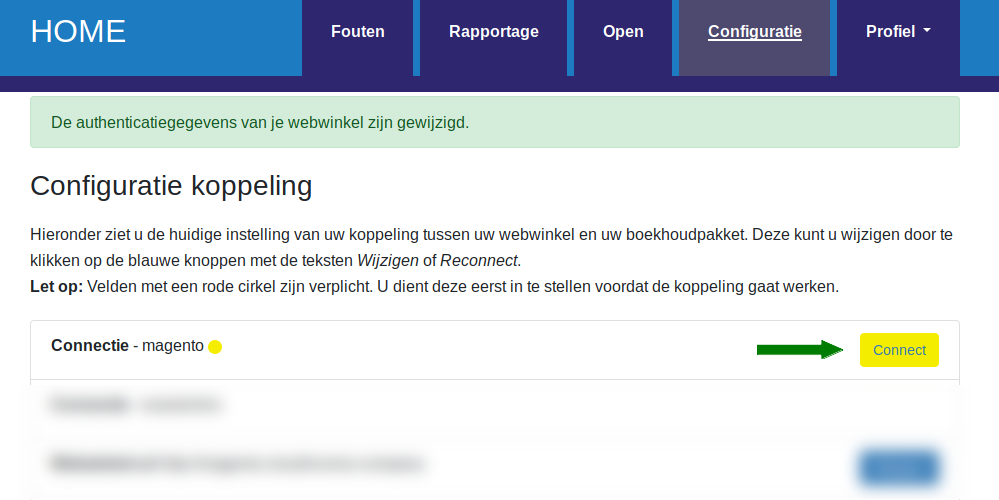
- Then you click the yellow Connect button to give the integration the correct authorization. Only after performing these two steps is a valid connection with the Magento webshop established. You can see this because the indicator will be green.
Authentication Eenvoudigfactureren
Authentication with Eenvoudigfactureren is done via the token you created in the previous section. You click the red Connect button next to the Eenvoudigfactureren Connection. A popup will automatically appear where you can enter the token.
If you wish to re-establish the connection at a later time, you can always do so by clicking the ReConnect button.
When processing to the Eenvoudigfactureren accounting system, the VAT percentages are transferred directly. Therefore, there is no possibility to post to separate VAT codes or ledger accounts.
7.Day-to-day: From Magento
In this section, we show how we retrieve the invoices from the webshop.
Once an invoice has been processed, it cannot be processed again. An invoice that is modified in the webshop after it has been processed will not be adjusted in Eenvoudigfactureren.
VAT numbers For business orders within the EU, outside the Netherlands, a VAT number is mandatory. The integration checks for this and also verifies that the VAT number is a valid VAT number.
VAT calculation: The integration always uses the prices in the [base_] fields, such as [base_grand_total] and [base_row_total].
The VAT amount in the invoice lines is determined as follows:
VAT amount = ['base_row_total_incl_tax'] - ['base_row_total']
The VAT percentage is determined as follows:
VAT amount/ ['base_row_total']
If the amount excl. VAT is 0, the VAT percentage defaults to 21%. Unfortunately, this cannot be adjusted.
Based on the VAT percentage, the VAT code and the general ledger account in Eenvoudigfactureren are determined. We notice that some Magento webshops make their own corrections to the VAT in their invoices. The VAT then does not exactly match the VAT of the products. This results in incorrect VAT percentages, such as 8% instead of 9% and 22% instead of 21%. The integration cannot correct this and will give an error message if 8% and 22% do not appear in the webshop's VAT settings. We generally see this problem occur when using small amounts. Unfortunately, the integration does not have an adequate solution for this.
Field-level specification invoices
| Below is a specification at the field level for retrieving invoices from Magento 2.x webshops. | |
| Name field | Values from Magento order |
| Factor for multiplying amounts | In the Magento credit invoices, the amounts are listed as positive amounts. This is because debit invoices and credit invoices are separate entities. In Magento, you therefore have two types of invoices, debit and credit, and both types have a positive amount. Therefore, the integration uses a factor = 1 for debit invoices and a factor = -1 for credit invoices. |
| Invoice-identifier | [entity_id] Please note, to keep those IDs unique between debit and credit invoices, the integration places a 1 before the invoice ID of the credit invoice. This is why you see a multiplication by the factor. |
| Invoice number | [increment_id] from the Magento invoice |
| Orderid | [order_id] |
| Order number | [increment_id] from the Magento order. If it is configured for the merchant that the order number is leading, then for the order number a C_ is placed. |
| Affiliate number |
Is determined based on the underlying order
|
| Order-identifier | This is determined based on the URL in the field [order] |
| Invoice date | [created_at] |
| ICP indication |
An invoice is an ICP invoice if:
|
| International indication |
An invoice is an international invoice if:
|
| Payment method |
The payment method is determined as follows based on the field [paymethod]:
|
| Paymentmethod-id | [paymethod_id] |
| Total amounts incl or excl VAT | The amounts in the order can be incl. or excl. VAT. This is determined by the field [taxes_included]. This value is important for determining the Total incl and the Total excl, see below. |
| Total incl | [base_grand_total]. The base_ part ensures that the amount is taken in the webshop's base currency. |
| Total VAT | [base_tax_amount] |
| Total excl | Total incl VAT - Total VAT |
| Shopping cart values | These values are read via [base_subtotal] and [base_subtotal_inc_tax] |
| Name field | Values from Magento order |
| Name product | [name], special characters are removed as much as possible |
| Amount | [qty] |
| Amount incl VAT | [base_row_total_incl_tax]; for the unit amount we divide by the quantity |
| Amount excl VAT | [base_row_total]; for the unit amount we divide by the quantity |
| VAT Amount with discount | [base_row_total_incl_tax] - [base_row_total]; for the unit amount we divide by the quantity |
| VAT percentage |
The VAT percentage is tricky with Magento invoices because the Magento API provides these prices in 2 decimals, which quickly results in a percentage of 20%, 22%, 8% or 10% for small amounts. There is a workaround, but that requires programming work on the side of the Magento webshop.
|
| Discount | [base_discount_amount] for the discount amount incl VAT. For the discount excl VAT [base_discount_amount] - [base_discount_tax_compensation_amount]. |
| Line prices incl and excl discount | These are calculated from the discount and the unit prices. The unit prices are multiplied by the quantity. |
| The shipping costs are added as a separate invoice line | The amounts are determined based on [total_shipping], [shipping_tax_percentage] and [invoice_row_taxes_included] as in other lines. This line is only added for an amount other than 0. |
| The payment costs are added as a separate invoice line | The amounts are determined based on [paymethod_costs], [extra_payment_option_price] and [invoice_row_taxes_included] as in other lines. This line is only added for an amount other than 0. |
| The surcharges are added as separate lines to the invoice | The amounts are determined based on [extra_costs], [credit_point_discount], [invoice_row_taxes_included] as in other lines. The amount is only added for an amount other than 0. This leads to a maximum of 2 extra lines. |
| Accounts and VAT codes from Eenvoudigfactureren | These are determined based on the settings in the integration, the delivery country of the invoice and the VAT percentages. The type for invoice lines is turnover / revenue, for the shipping costs line shipping / shipping costs and payment costs payment / payment costs. |
8.Day-to-day: To Eenvoudigfactureren
Creating invoices
When creating invoices, an invoice is created by default with the amounts incl. VAT and the order number in the reference field. The invoice number is empty by default, so that the invoice number is determined within Eenvoudigfactureren. We recommend this method.
However, it is possible to process the amounts excl. VAT. In some situations, there are also possibilities to add an order or invoice number to the reference and fill in the invoice number of Eenvoudigfactureren.
When processing customer information, it is first checked whether the customer has been processed before. If so, this Eenvoudigfactureren debtor is used as the debtor for the Eenvoudigfactureren transaction. If the customer is not yet known, they are added to Eenvoudigfactureren. Matching is based on email address. Please note: The integration only creates debtors. The integration does not modify debtors.
It is currently not possible to post to products.
The integration creates the invoice in Eenvoudigfactureren, but will not automatically send the invoice to the debtor. This is possible and can be requested by sending us an email stating the license key.
Field-level specification Eenvoudigfactureren

| Name | Example | Note |
| Customer identifier | 1234567 | Customer identifier within Eenvoudigfactureren |
| Invoice number | Empty by default | Can be filled with invoice- or order number upon request |
| Payment period | 14 | Not adjustable |
| Reference | order number | Adjustable |
| Date | 2024-05-23 | Sales date - please note, this is the Invoicedate in Magento |
| Amounts incl. VAT | yes | Upon request, amounts excl. VAT can be processed |
| Invoice lines | ||
| Product name | Bicycle | As on the line in the sale |
| VAT percentage | 21 | Depending on the VAT percentage in the sales line |
| Amount | 2 | |
| Unit price | 19.99 | |
| Name | Example | Note |
| Name | Bakery De Witte | If the company name is not filled, the first name plus last name will appear here |
| To the attention of | Karin de Wit | If the company name is not filled, this field is empty |
| Address line 1 | Stationstraat 12 | |
| Postal code | 1000 AA | |
| City | Amsterdam | |
| info@sponiza.nl | ||
| Telnr | 0632281625 | |
| Contacts | ||
| Contact name | Karin de Wit | |
| info@sponiza.nl | ||
| Telnr | Karin de Wit | 0632281625 |
9.Support
Read more Support .... Read less Support ....
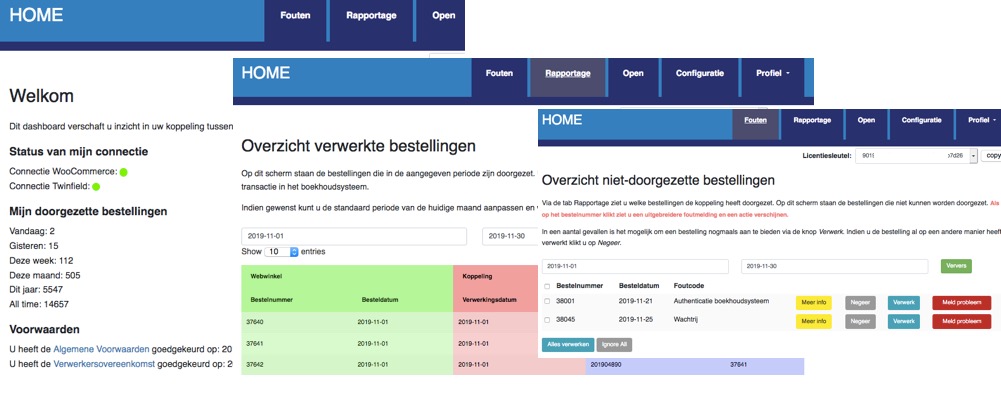
Explanation tabs dashboard
On the Dashboard >> Report you can see which invoices from your Magento webshop, and when, have been transferred to Eenvoudigfactureren.What if invoices are missing in Eenvoudigfactureren
If invoices are missing in Eenvoudigfactureren we recommend following the steps below:- Log in to the dashboard: https://uwkoppeling.webwinkelfacturen.nl. The username and password are included in the registration email.
- Go to the Errors tab and check if invoice is there. You may need to adjust the search period if the
invoice is from a previous month. If you find invoice in this overview:
- Check the error code and verify whether you can resolve it yourself.
- If yes resolve the issue and click the blue Process button to resubmit the invoice.
- If not use the red Report problem button to create a ticket with us.
- Note if there are multiple errors, please create only 1 or 2 tickets. We will automatically see the other issues.
- Go to the Report tab and see if invoice is listed there. If so, you'll often see an identifier for Eenvoudigfactureren (in the purple section of the overview) that you can use to search for invoice.
- Go to the Open tab and check if invoice is there.
- If you cannot resolve the issue, you can always create a ticket via the green Ask us button.